So many websites require us to sign up to get the most out of them. Inevitably, this requires providing our email address. That, in turn, leads to tons of spam. To help with that, Apple developed its Hide My Email feature of iCloud+. This creates a randomly-generated email address you can provide instead. Emails to that address forward to your real account, and you can easily disable the random one if it gets too pesky.
What about Sign In with Apple which does not require a subscription to iCloud Plus. The difference is that Sign In with Apple’s feature only works for signing up for apps and services, while the Hide My Email feature that’s part of iCloud Plus lets you create and delete email addresses any time you need to. In other words, the “old” feature is an option you can only activate when signing up for a service with your Apple ID, but the iCloud Plus feature allows you to do the same thing on demand for any purpose.
Here’s how you can use Hide My Email within Apple’s Mail app.
How to use Hide My Email on your iPhone
You’ll see Hide My Email as an option in two situations:
Using Sign in With Apple
A few years ago, Apple launched the Sign in With Apple program. This lets you make accounts in new apps using your Apple ID information. It’s a quick way to get started in an app without having to remember a new username and password.
1. Open an app that offers Sign in With Apple as a choice when creating your account, and pick that option.
You should be given a choice: You can pick Share My Email, which gives the app your real email address; or Hide My Email, which will give them a fake one.
2. Pick Hide My Email, and then Continue.
Going forward, any email the app sends you will still be sent to your real email address, but the app won’t know what that address is.
Anyone with an Apple ID account can use this feature.
Signing up for a new service or filling out a form
This feature is only available to iCloud+ users.
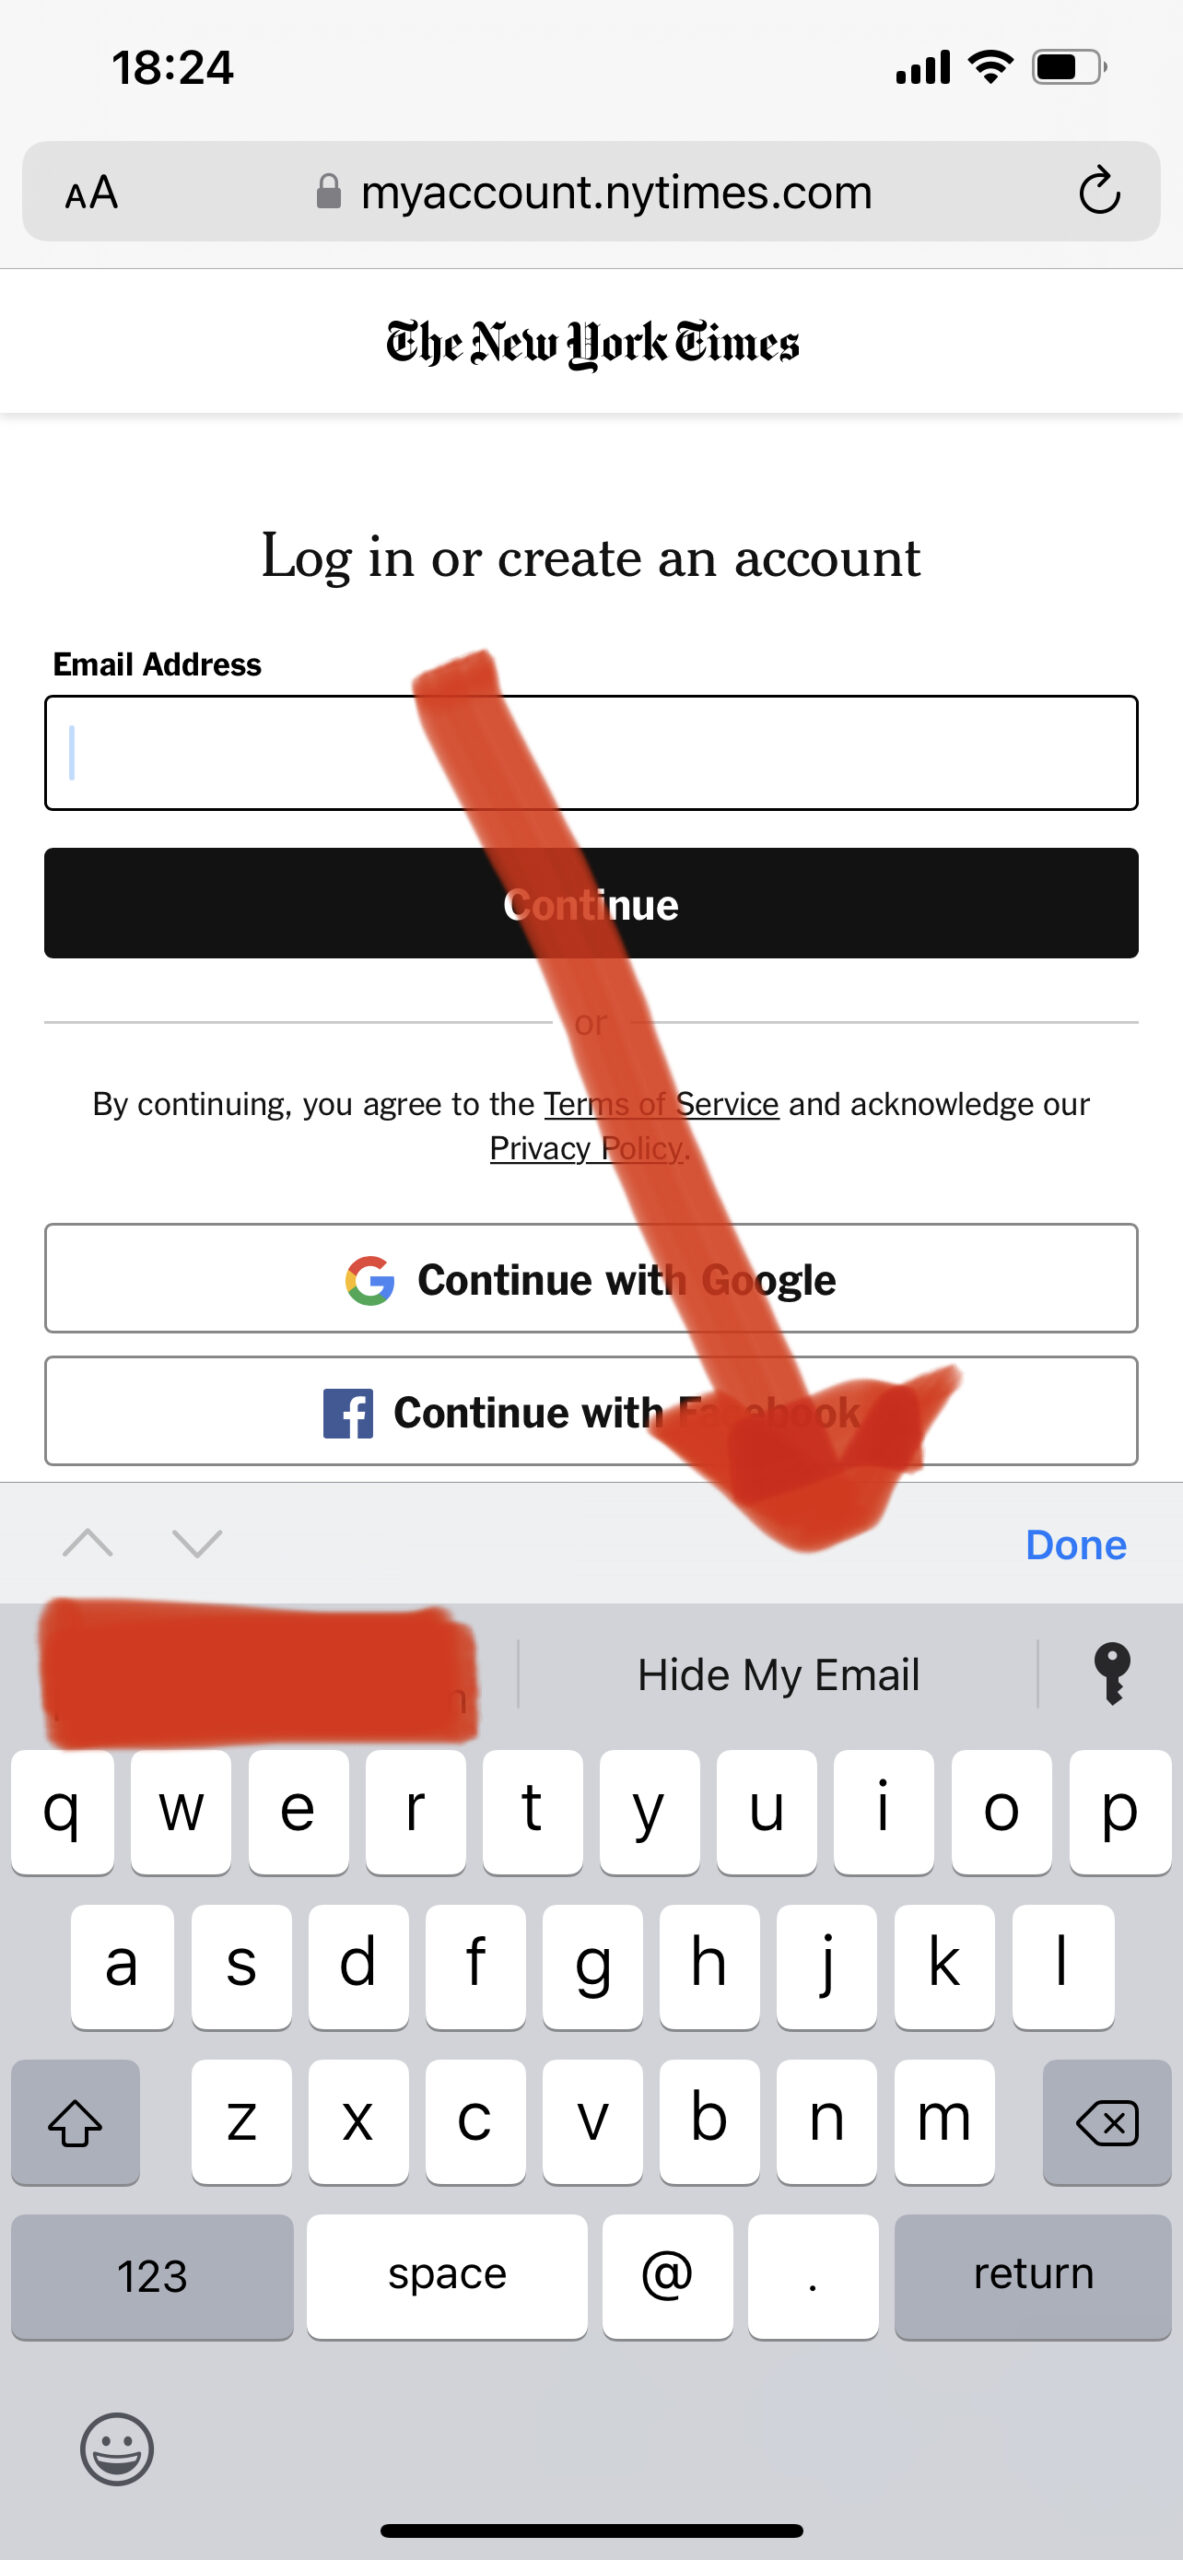
When you fill out forms online, they usually ask you for your email address. Hide My Email works here, too.
1. Tap the text field that asks for your email address.
2. If your phone recognizes that it’s asking for your email, you’ll see Hide My Email appear as an autocomplete option. Tap it.
3. A menu will appear and offer you a randomly generated email address. Tap the refresh button next to it to get a new one, or Continue to save and use it.
4. On the next screen, give the fake email a Note so you can remember what it’s being used for, then tap Use.
Sending emails from a fake email address
Newer versions of iOS 15 let you make a Hide My Email address straight from the Mail app, and use it to send emails from that fake address.
1. Open the Mail app and start composing an email.
2. Tap the From field and select Hide My Email.
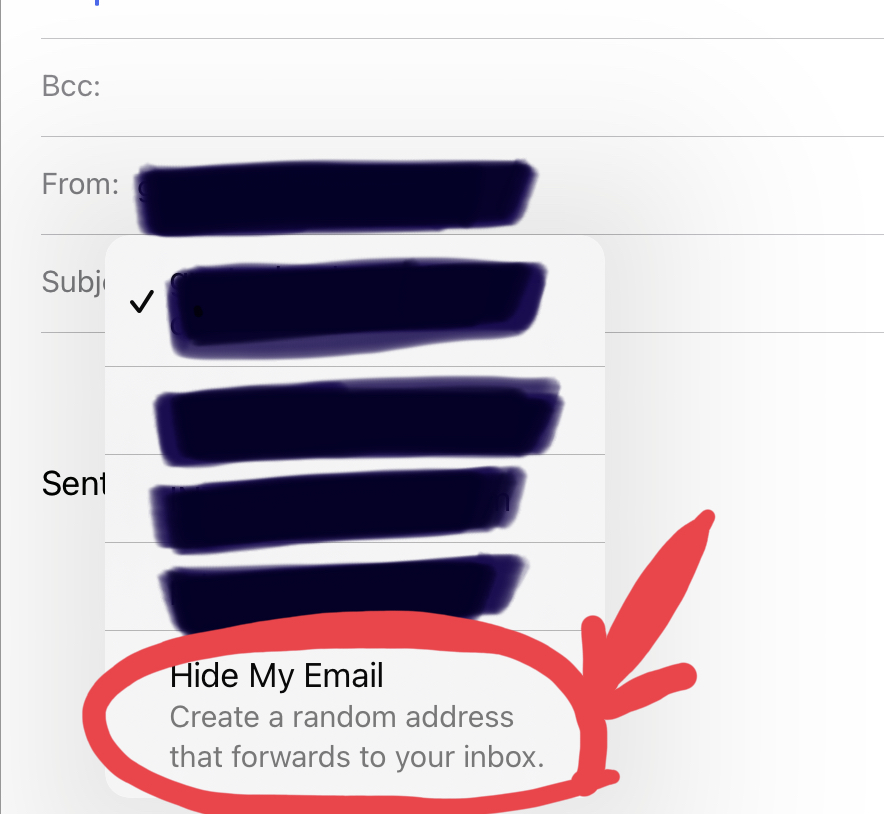
As you start writing the rest of the email, your phone will create a fake email address for you.
How to find and delete your Hide My Email addresses
You can manage all of your fake Hide My Email addresses from the Settings app.
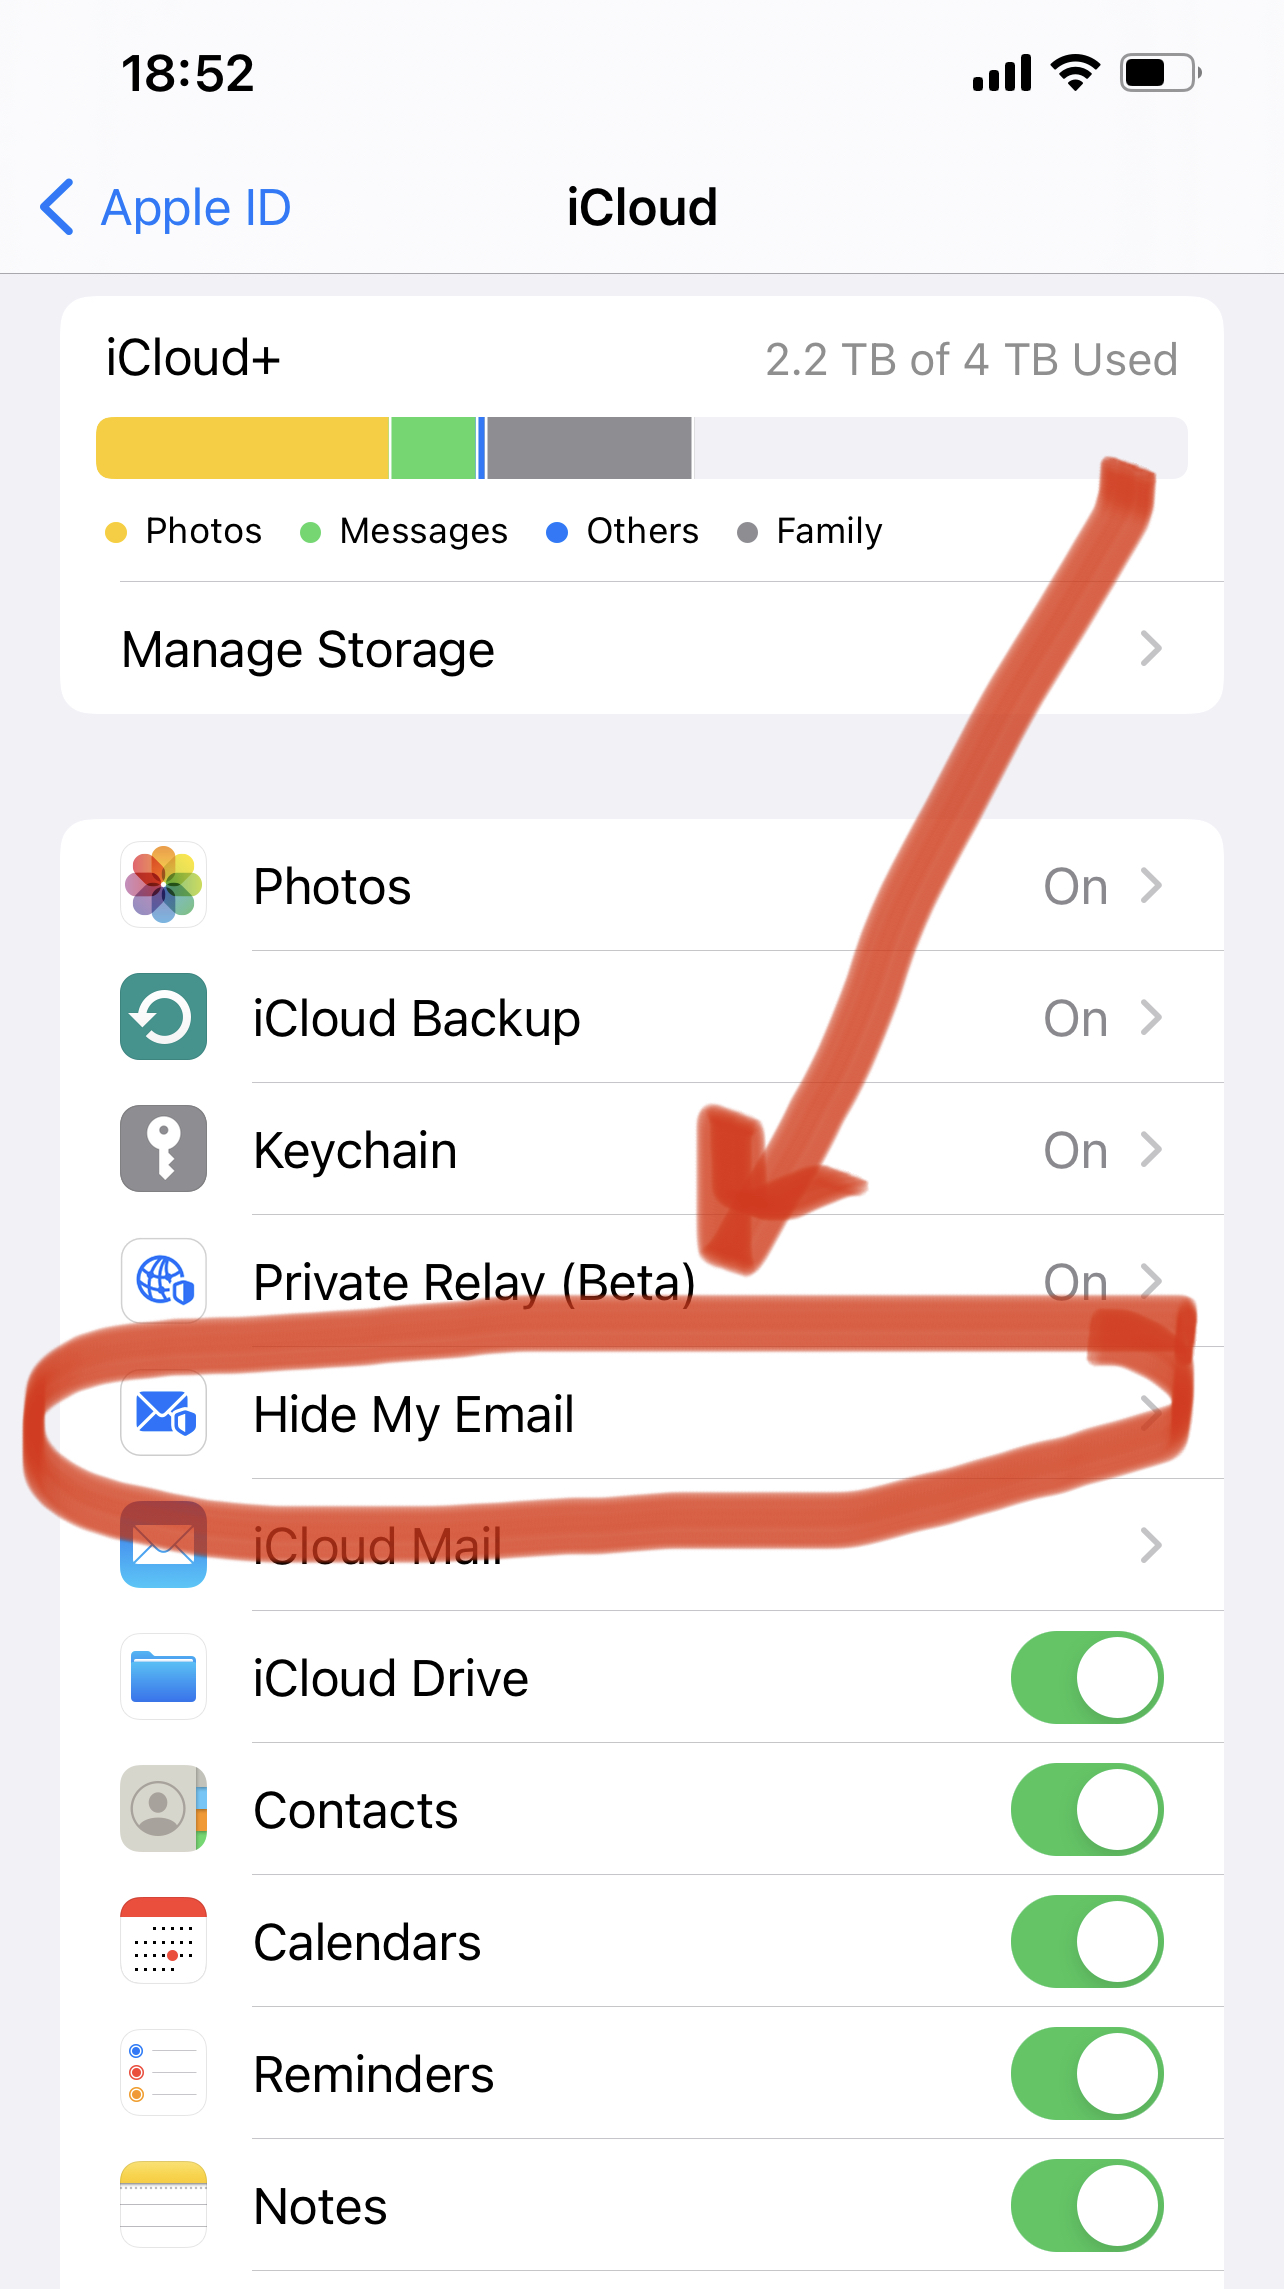
1. Open the Settings app and tap your name at the top of the page.
2. Tap iCloud, and then Hide My Email.
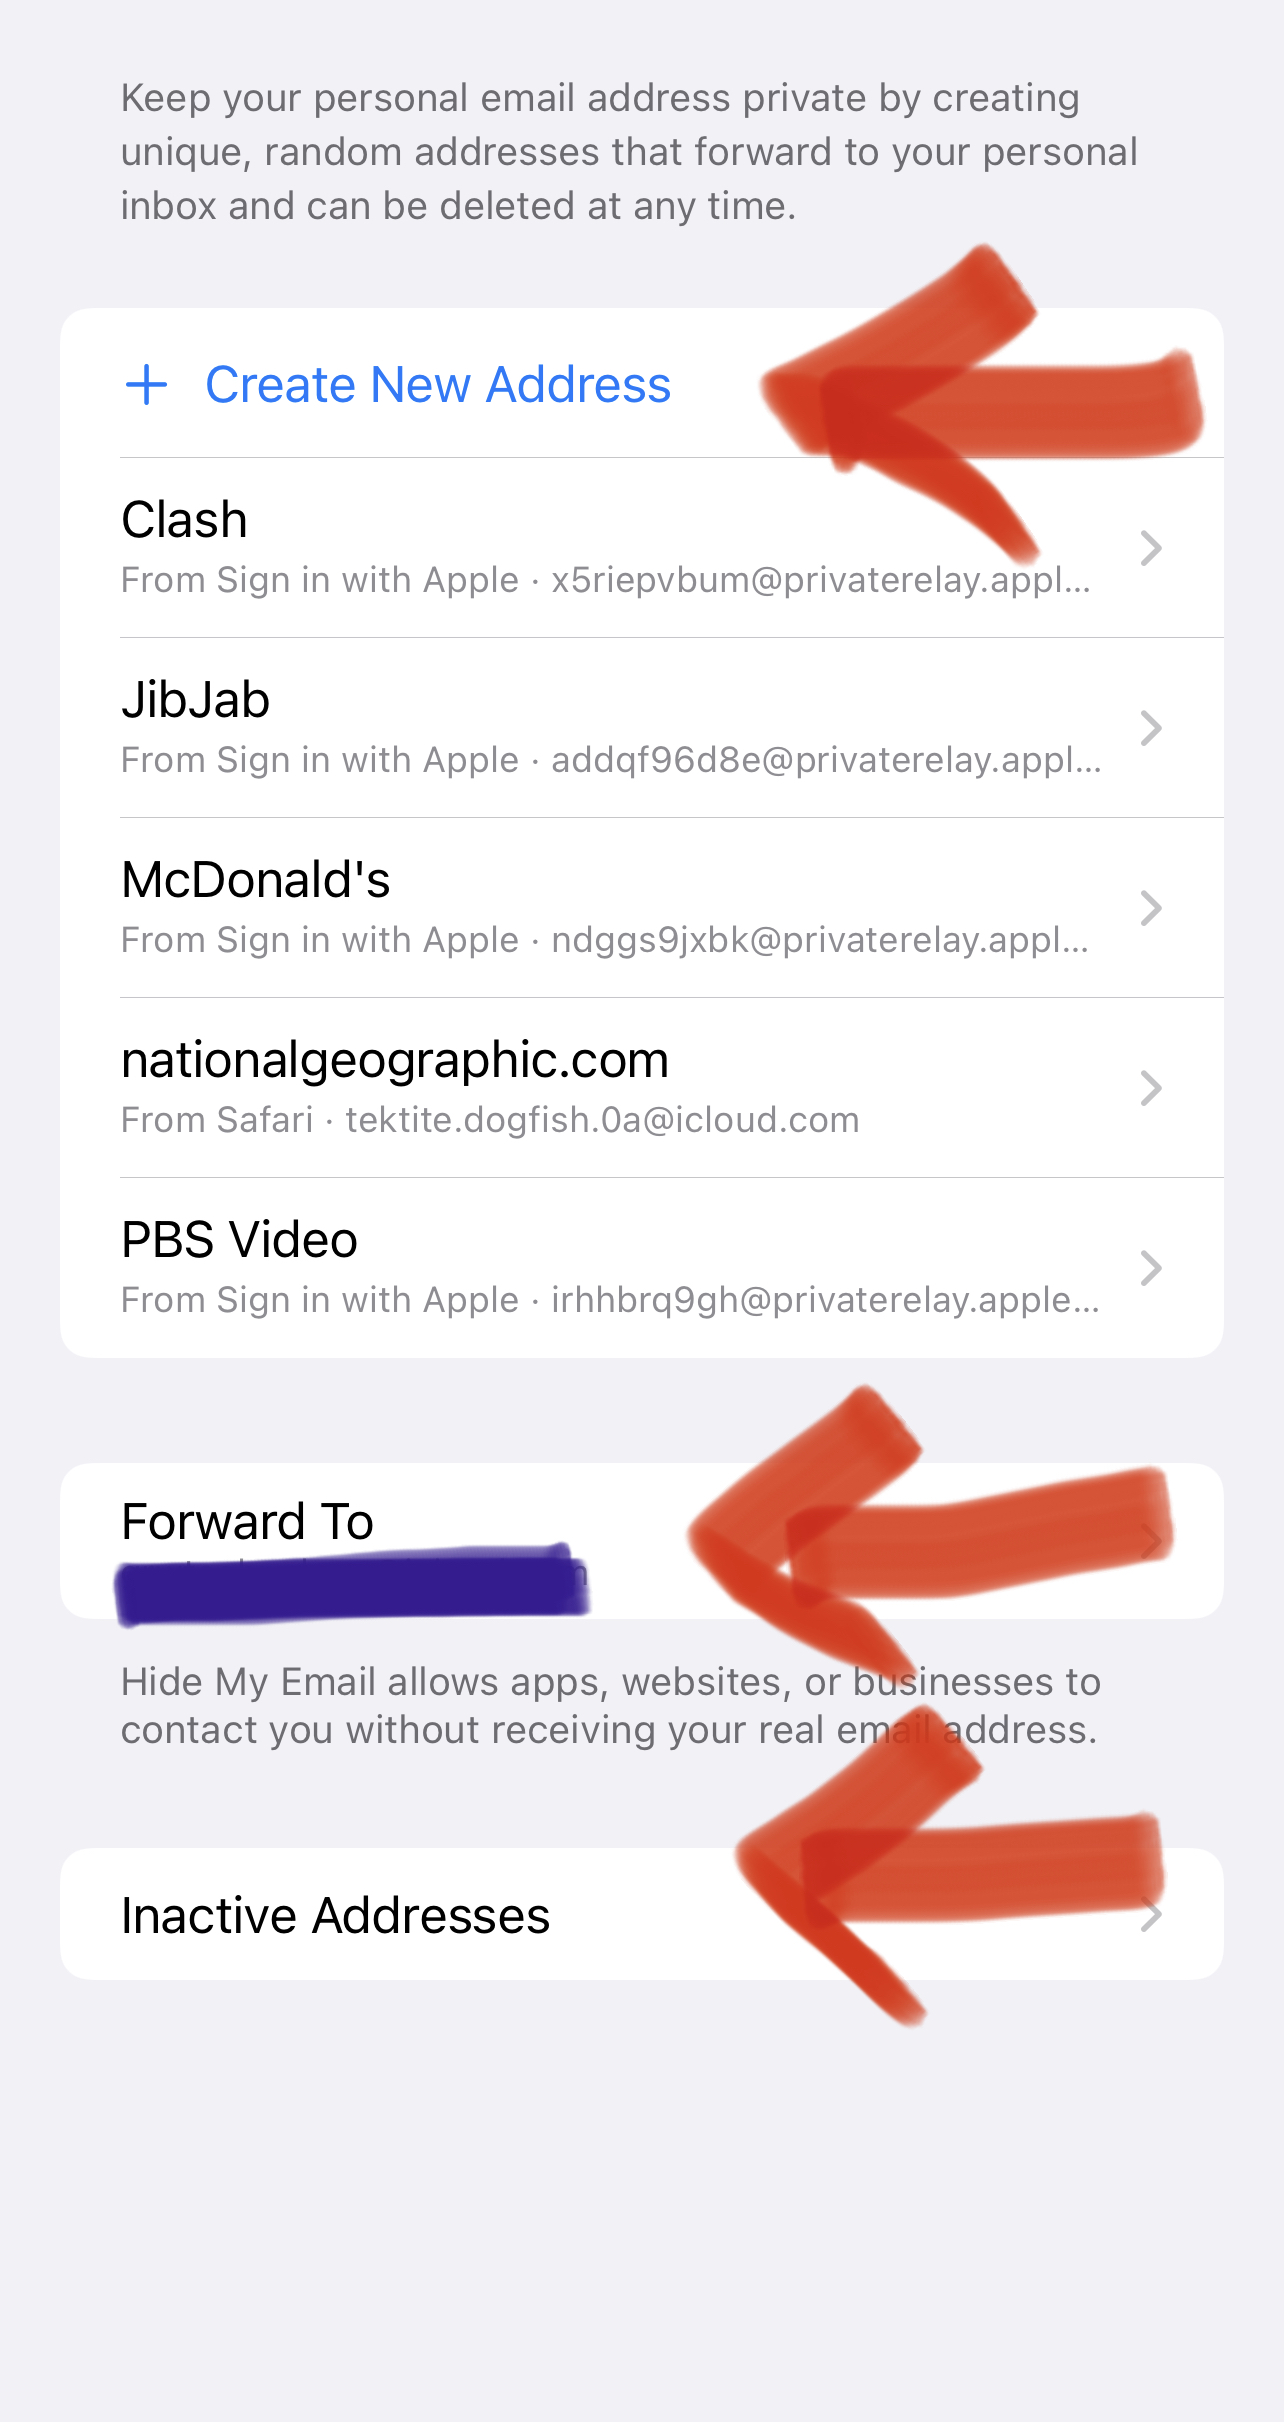
3. You’ll see a list of all the emails you’ve created, the option to create a new one right away, and a tab that lets you change where your emails get forwarded to. Creating a new email here will give you an address that you can freely use anywhere, even if you’re not offered the Hide My Email option.
4. If you tap on one of your existing addresses, you can change its label and note or Deactivate it. Deactivating the address won’t delete it, but emails sent to it won’t be forwarded to you anymore.
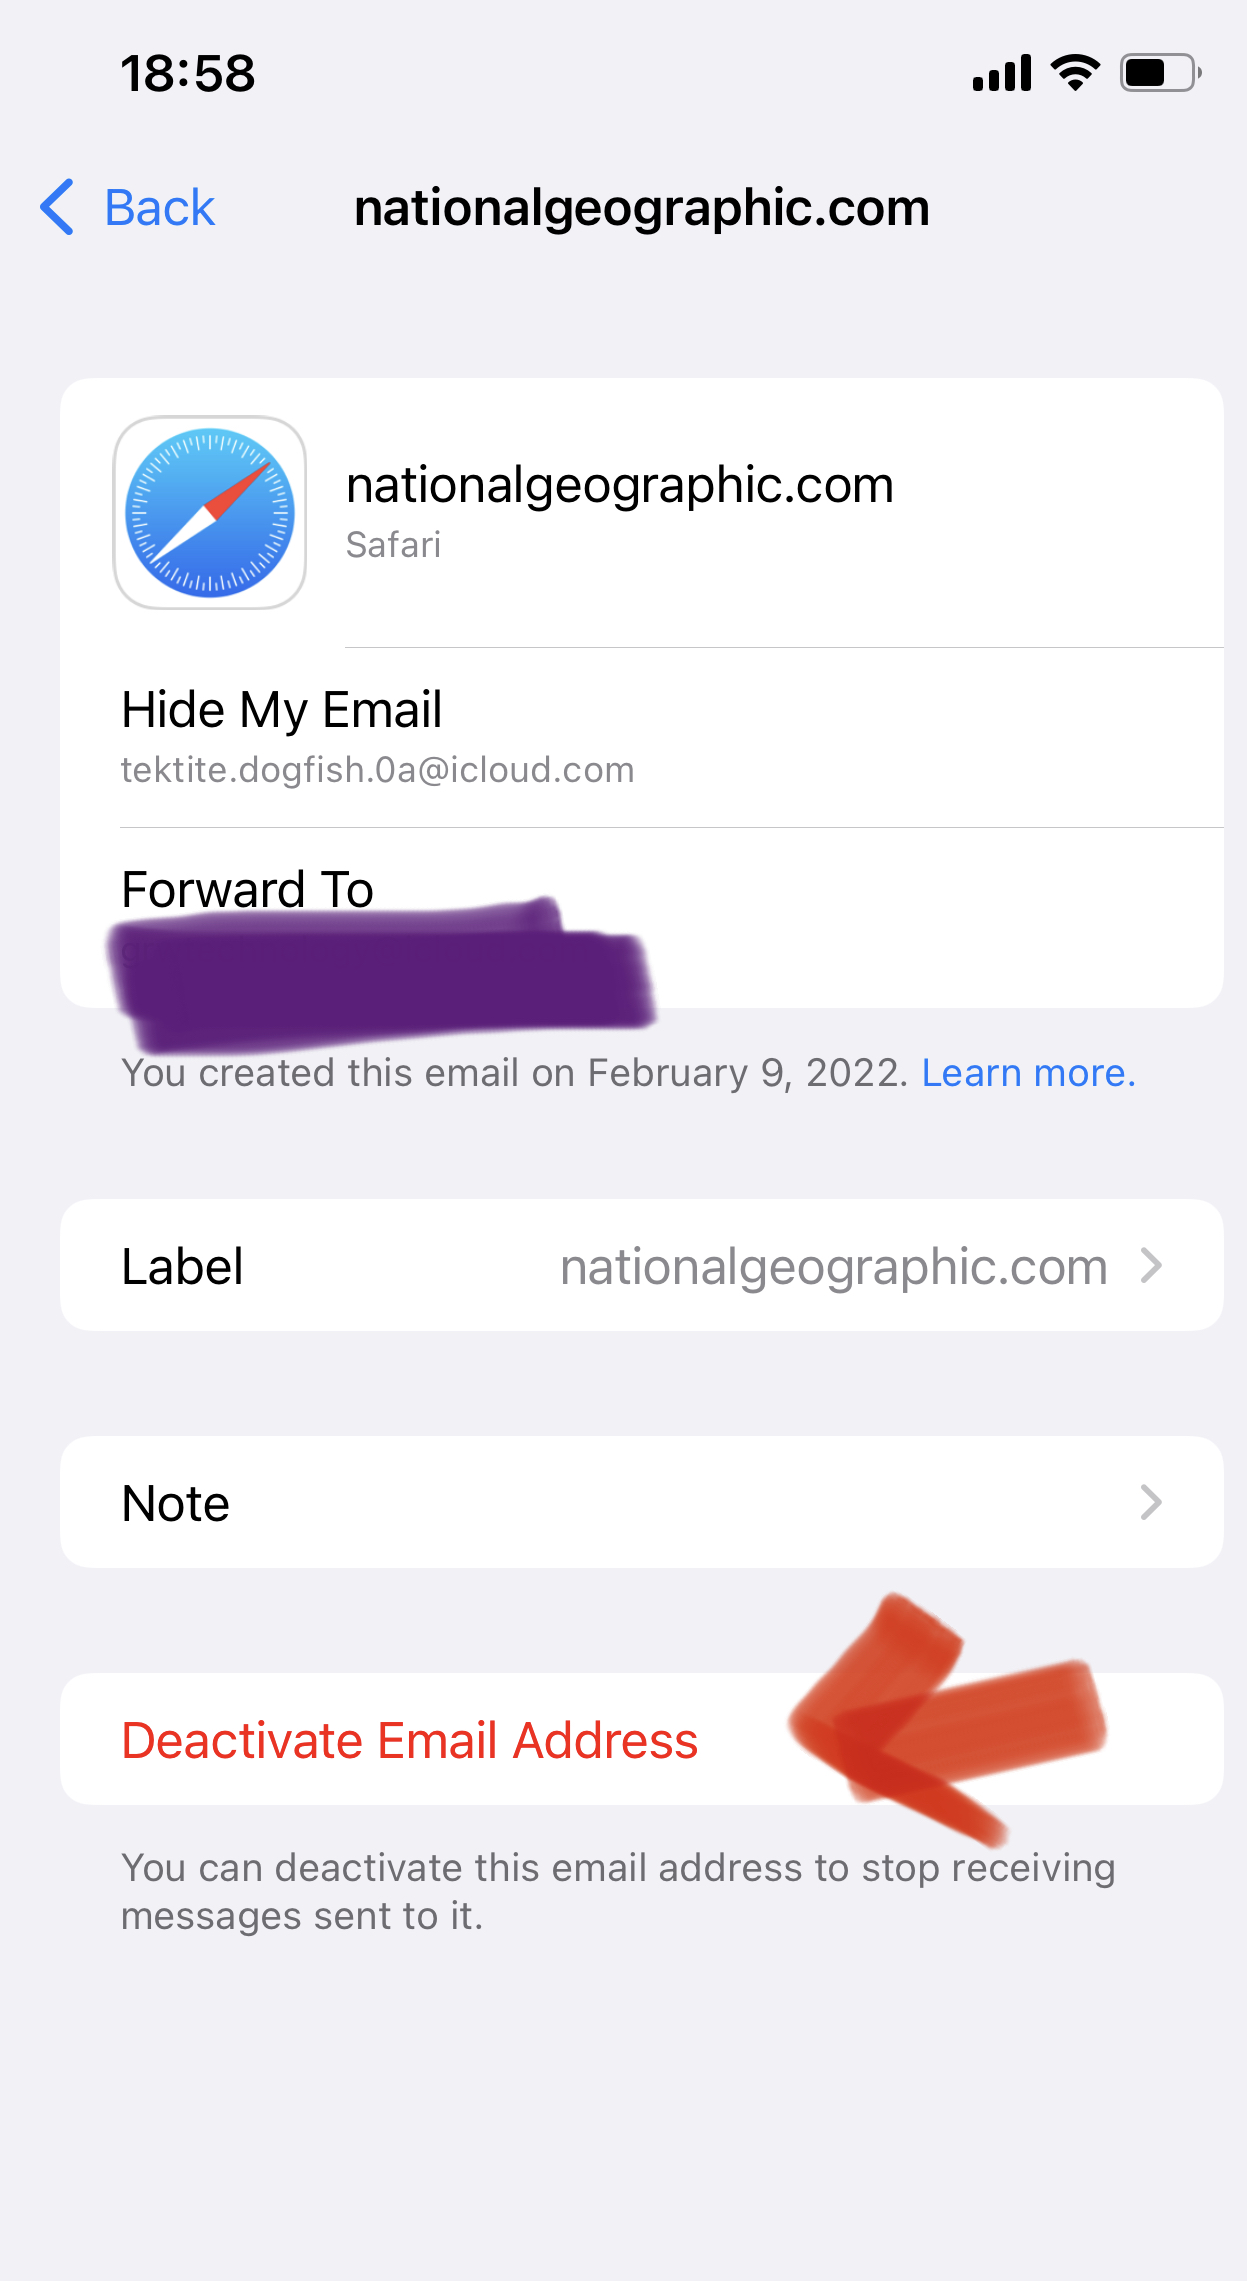
Deactivated email addresses can be reactivated by going back to the main Hide My Email page and selecting Inactive Addresses.